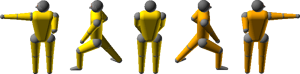
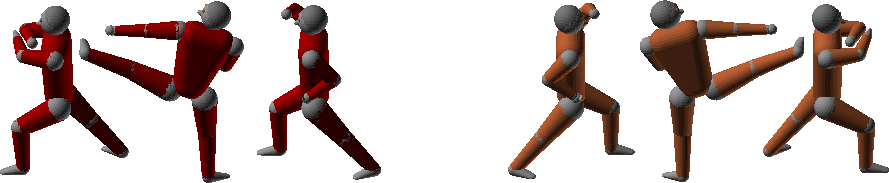
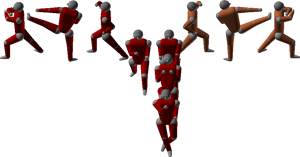
Taegeuk Oh Jang - alternative diagram
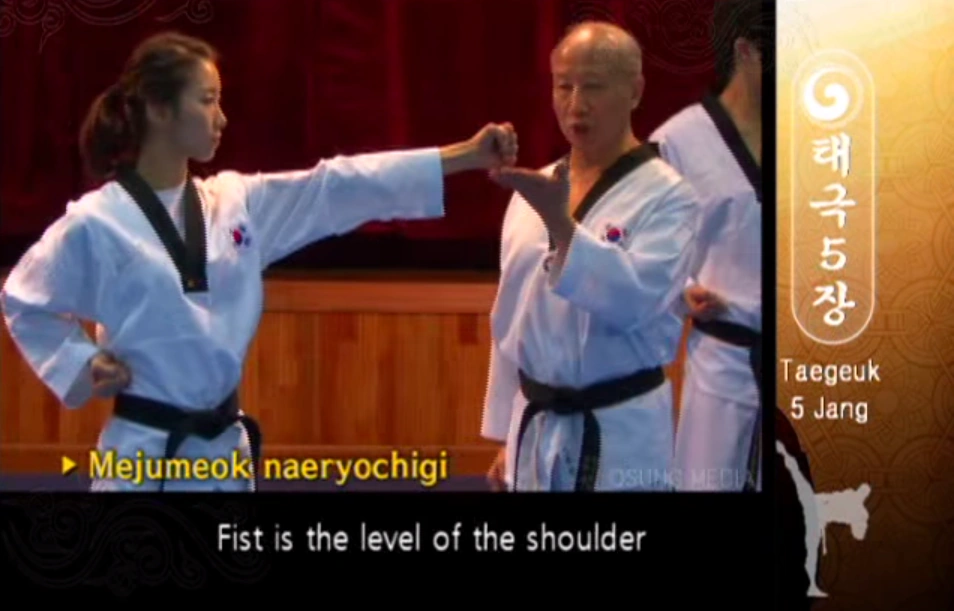
Taegeuk Oh Jang (also spelled Taegeuk O Jang) is the fifth of eight "taegeuk" forms (i.e., poomsae) used by Kukkiwon and the World Taekwondo Federation (WTF). The word "Oh" is the number 5 in the sino-Korean numbering system.
Each taegeuk form is represented by a trigram (such as ☴); trigrams are divination symbols derived from the I Ching. The trigram for Taegeuk Oh Jang represents the concept of "Seon" (also spelled Son). Seon symbolizes the wind, which is simultaneously powerful and yet gentle. This form should be performed with flexibility and unyielding power.
This form emphasizes backfist strikes and introduces elbow strikes. 4th Gup grade trainees practice this poomsae.
Trivia:
- Taegeuk O Jang and Taegeuk Sa Jang are the only Taegeuk forms where you transition from the first line to the third and the third line to the second.
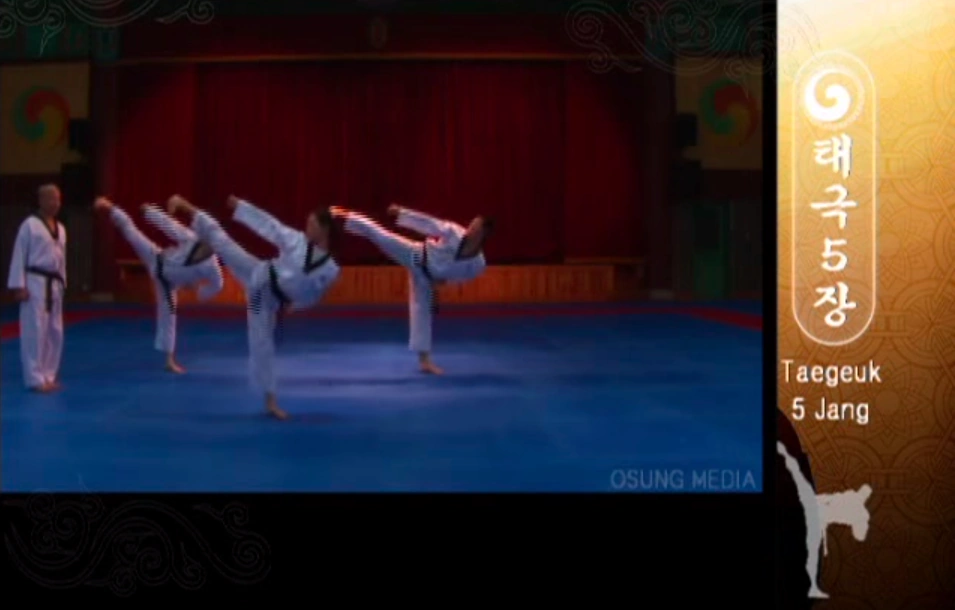
Video
The Kukkiwon official video for this form is on YouTube here.

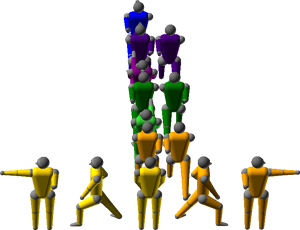
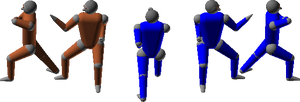
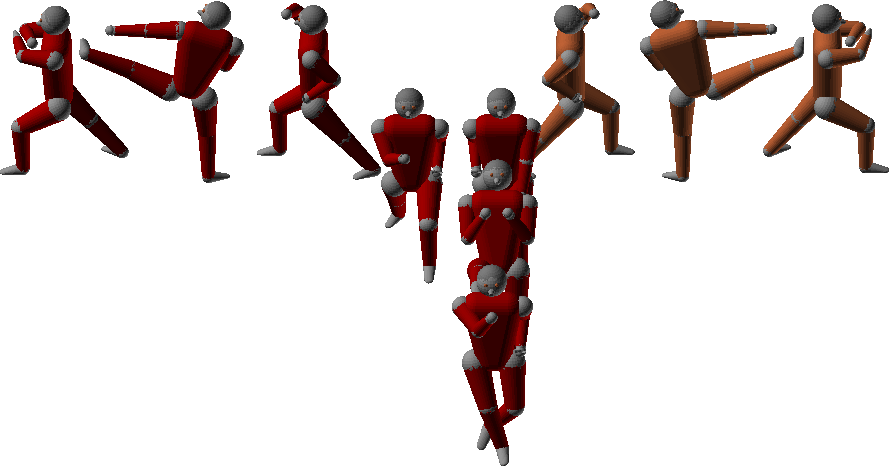
Diagram
To print the diagram, click on the image and select "See full size image," or right-click and open the image in a new tab.
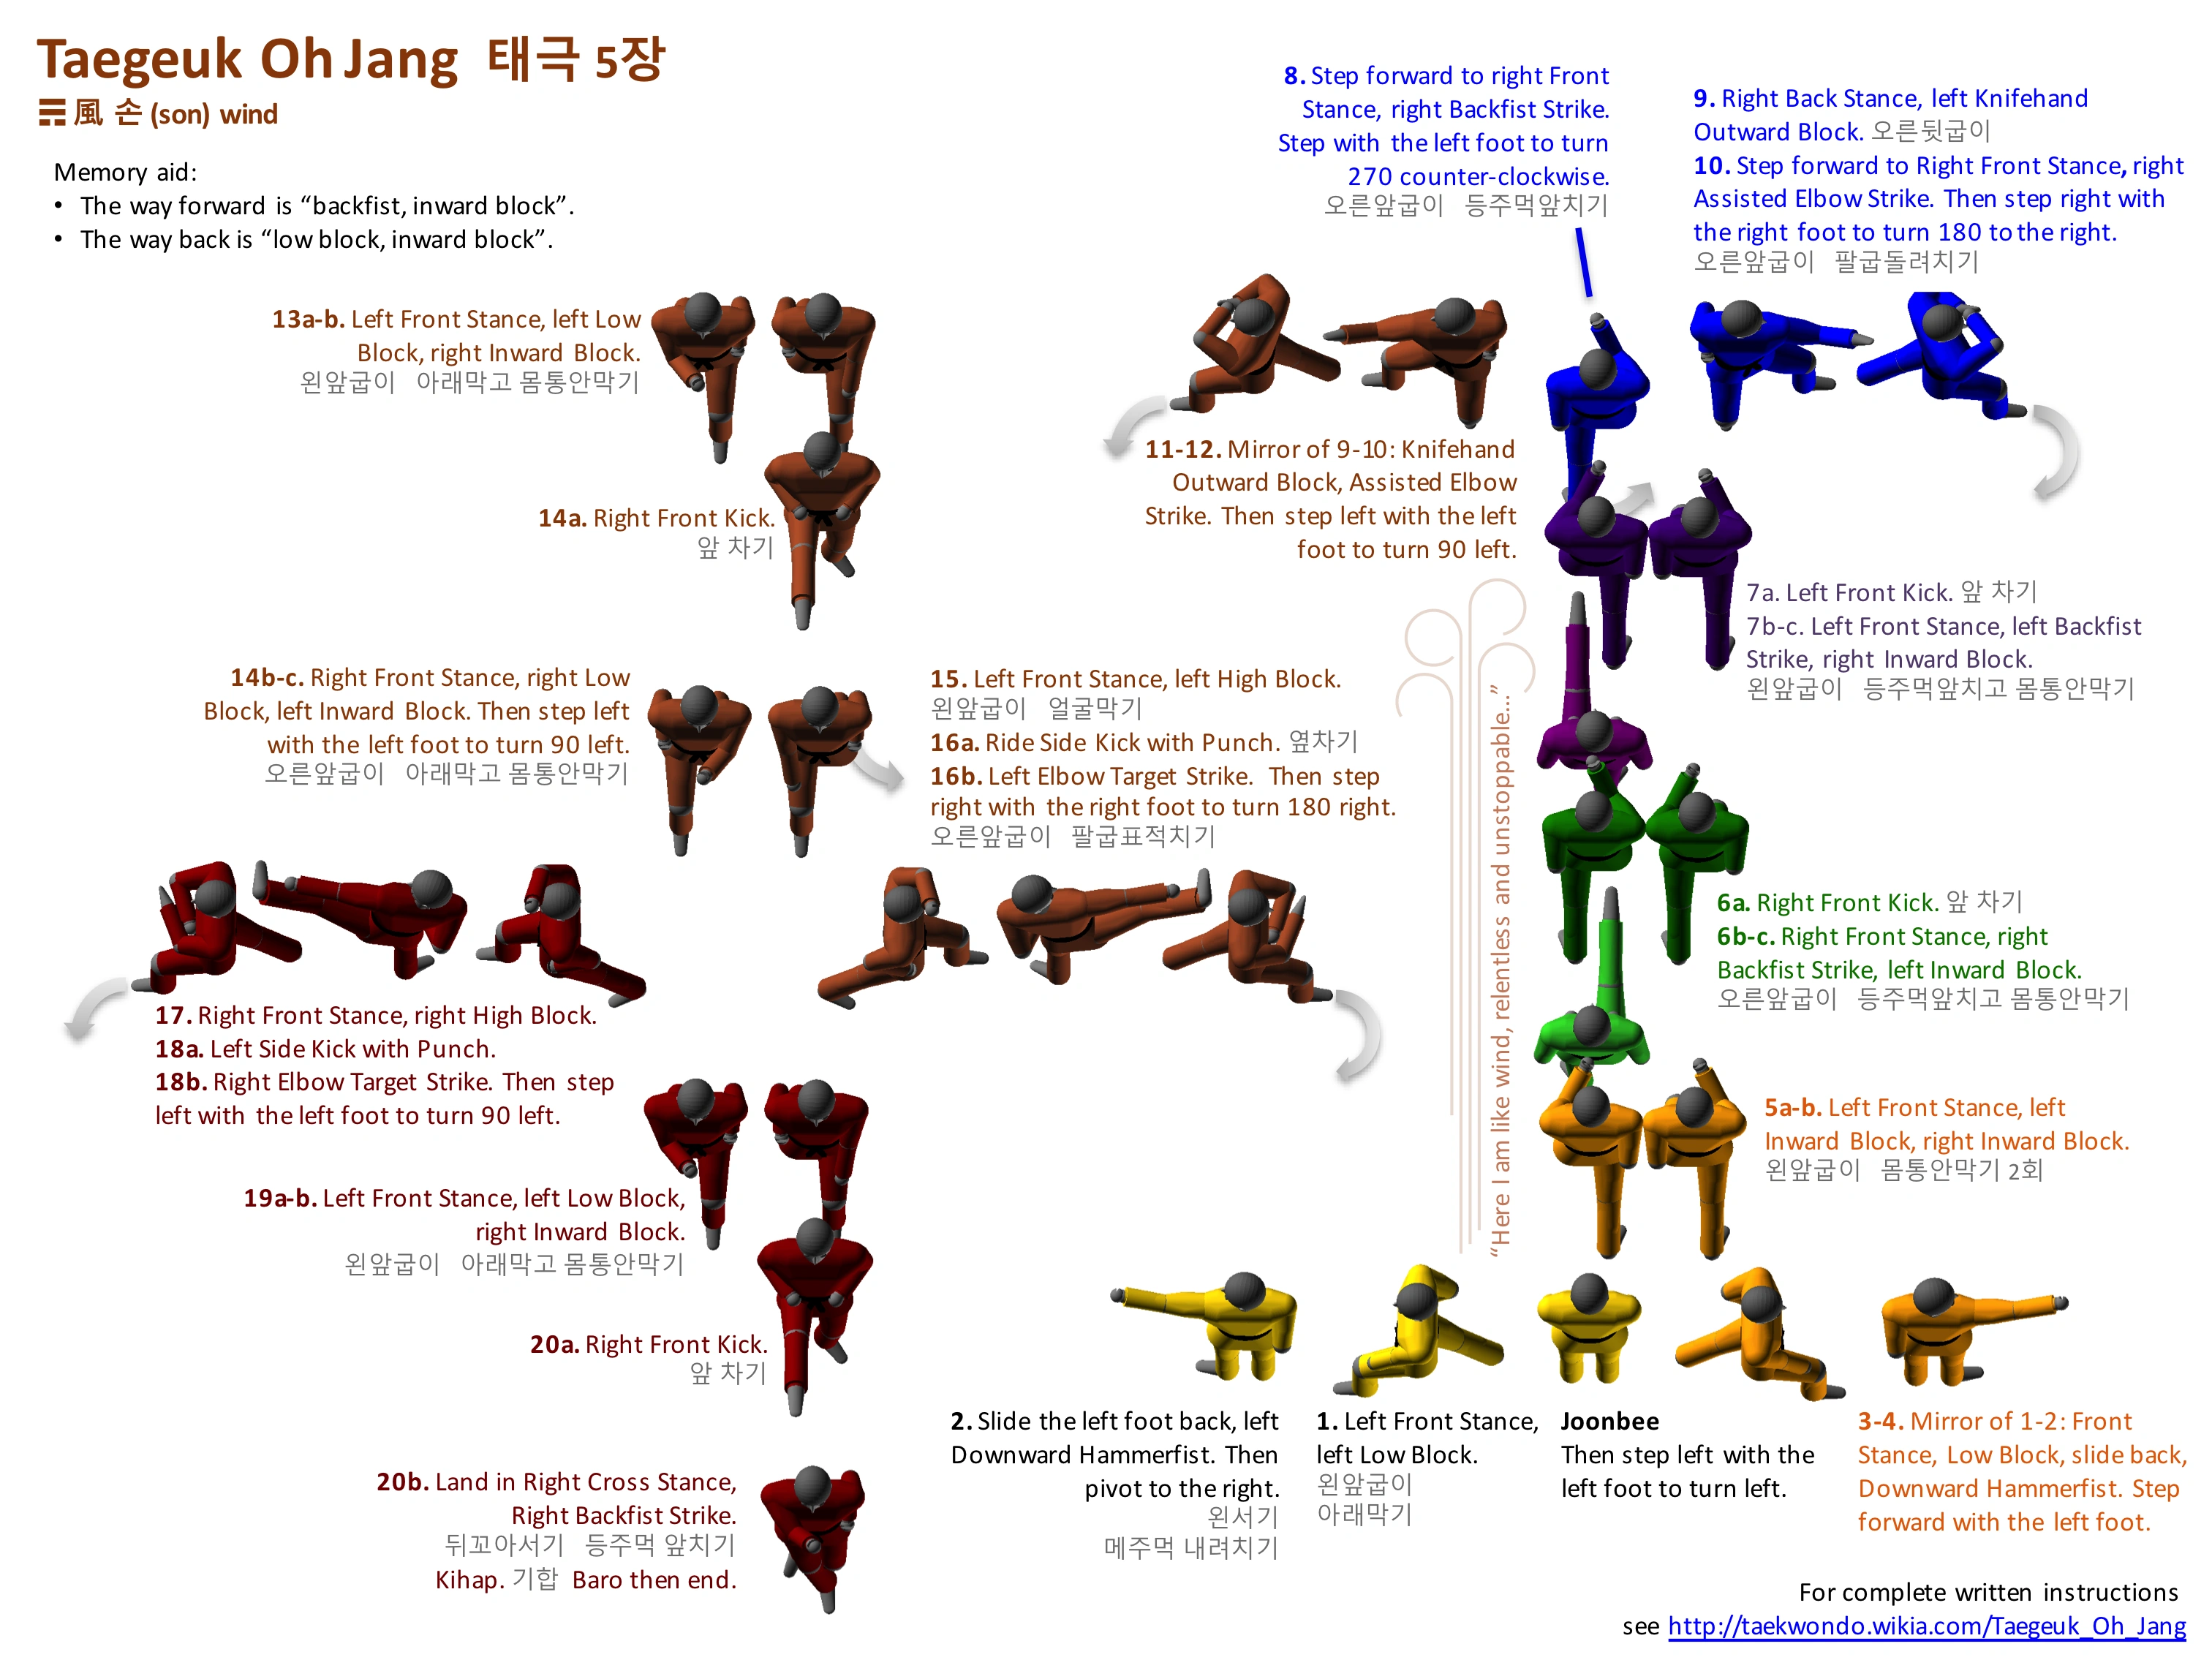
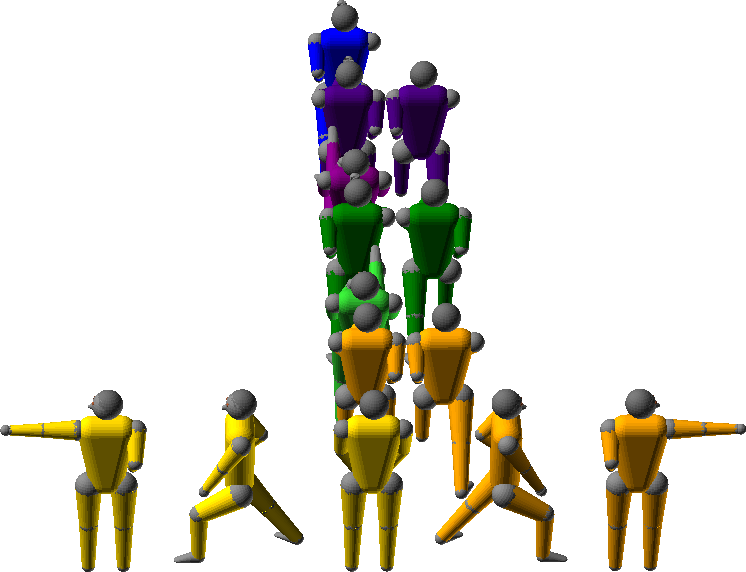
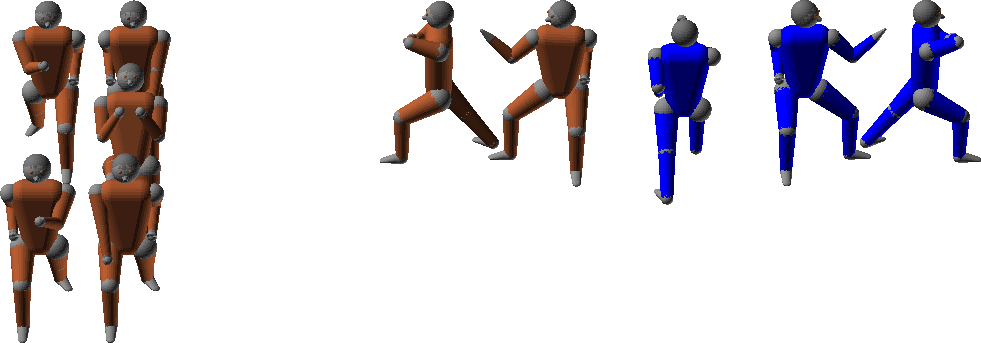
Diagram with Chambering
The following diagram represents an overhead view of this form, starting at the bottom of the diagram; see How to Read Poomsae Diagrams for additional detail. For a printable version of the form, click on the diagram and select "Full size image".

(To edit the image above, obtain the native PowerPoint file via http://poomsae.me. It is available via a Creative Commons - Share Alike license.)
New movements in this form: Hammerfist (at step 2), Inward Elbow Strike (at step 10), Elbow Target Strike (at step 16b).
Other movements in this form: Low Block, Inward Block, Front Kick, Backfist Strike, High Block (aka Upward Block), Side Kick, Knifehand Block.
Written Instructions
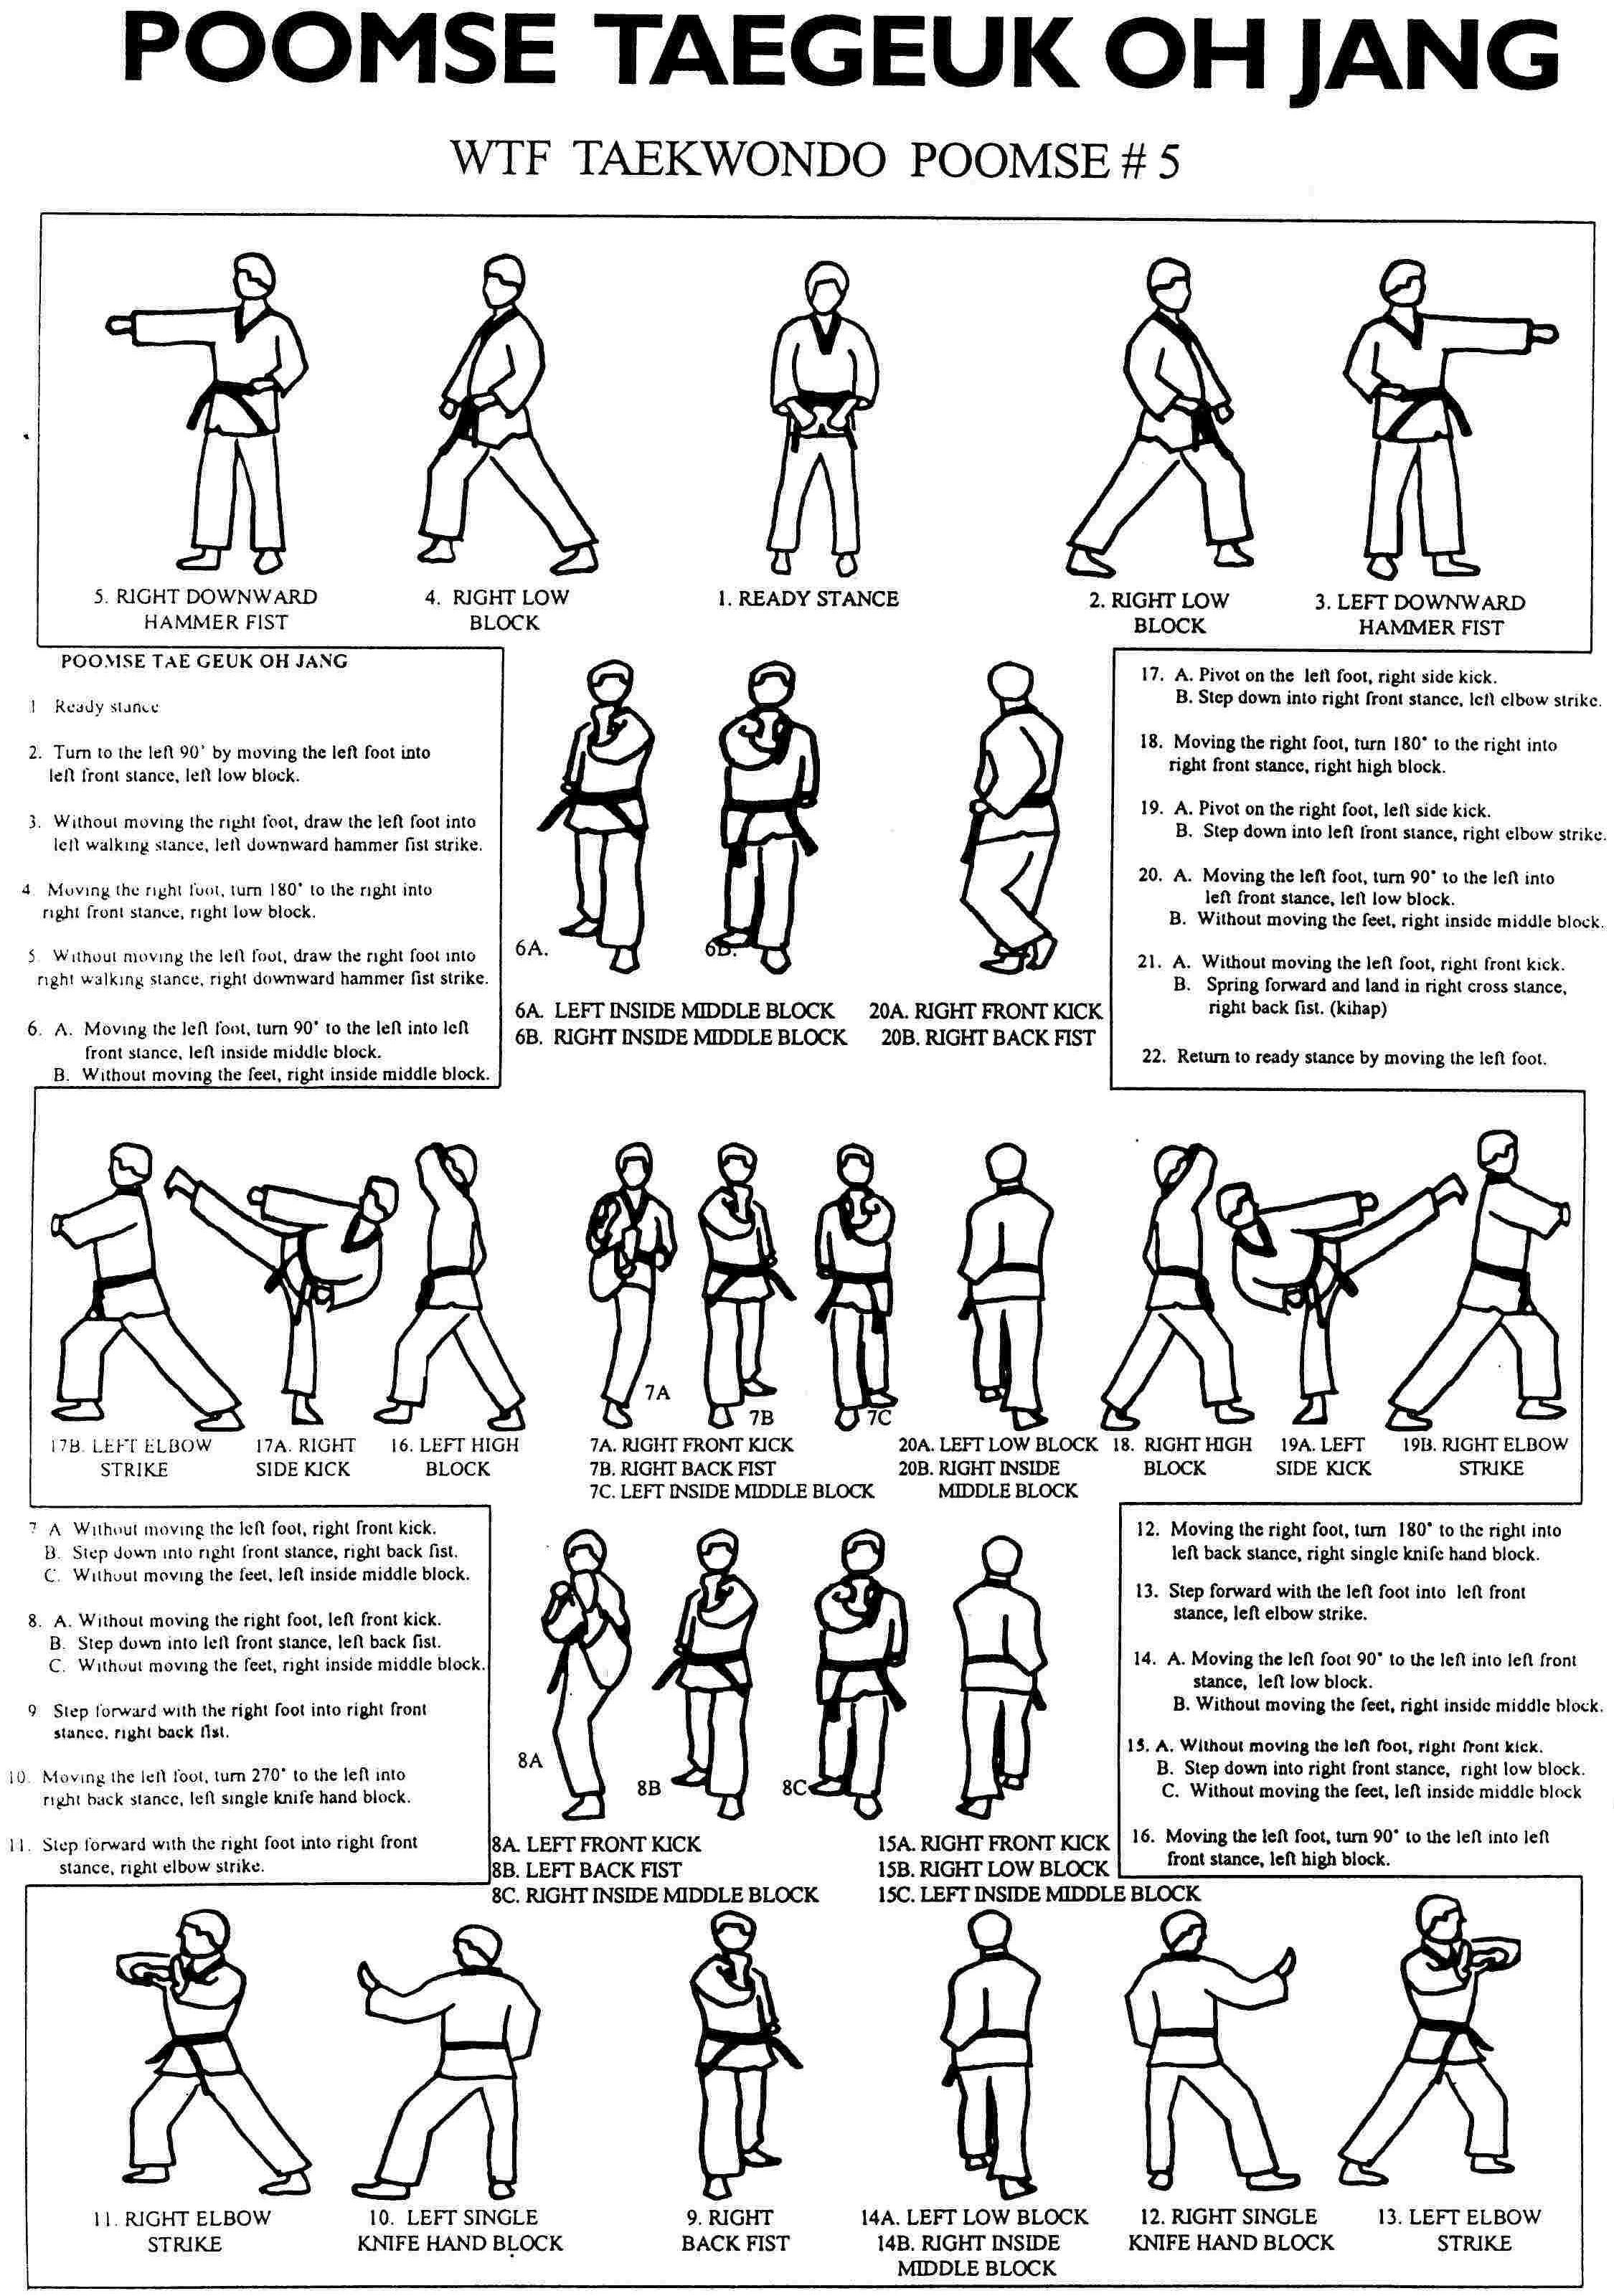
Like all Taegeuk forms, this poomsae is performed on three lines. Imagine three parallel lines laid out side-to-side before you. You first perform the steps on the first line, then step forward to the second line, perform the steps on the second line, step forward to the third line, etc. The left side of each line is a mirror image of the right side of the line.
FIRST LINE
First Line: Low Blocks and Downward Hammerfists

Hammerfist Strike
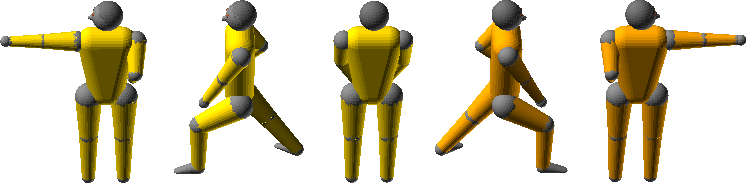
- Start in the Ready position or "joon-bee" stance.
- Chamber the left fist to the right shoulder in preparation for a downward block (aka low block). Aim the right arm forward.
- FIRST GOING LEFT (Da 1)...
- 1. Step with the left foot to turn left into a left front stance (aka long stance). Left low block.
- Chamber the left fist below the right armpit. The right arm should be bent up in front of you to aim.
- 2. Pull the left foot back and pivot to the right so that your torso is facing forward in a walking stance. (Some schools use a left stance here.) Your head should still be looking to the left (Da direction). Raise the left fist in a high arc and then bring it down for a hammerfist strike to the opponent's temple.
- Chamber the right fist to the left shoulder in preparation for a downward block. Aim the left arm forward.
- 1. Step with the left foot to turn left into a left front stance (aka long stance). Left low block.
- THEN GOING RIGHT (Ra 1, mirror image)...
- 3. Step with the right foot to turn right into a right front stance. Right low block.
- Chamber the right fist below the left armpit. The left arm should be bent up in front of you to aim.
- 4. Pull the right foot back and pivot to the left with your torso facing forward in a walking stance. (Some schools use a right stance here.) Your head should still be looking to the right (Ra direction). Raise the right fist in a high arc and then bring it down for a hammerfist strike.
- Chamber the left arm to the side in preparation for an upcoming inward block. The left arm should be aimed in front of you.
- 3. Step with the right foot to turn right into a right front stance. Right low block.
First Line transitions to the Third Line: Kick, Backfist, Inward Block...repeat
- TRANSITION TO THE THIRD LINE...
- Memory tip: this transition to the third line uses inward blocks and backfist strikes. Later in this form, when you return to the first line, you'll be using inward blocks and downward blocks instead.
- Performance tip: remembering that backfist strikes should be mouth-height, but inward blocks should be shoulder-height. So as you performs steps 6 and 7, make sure the backfist strikes are "higher" than the subsequent inward blocks.
- 5a. Step with the left foot to turn left into a left front stance. Left inward block.
- Chamber the right arm to the side in preparation for an upcoming inward block. The right arm should be aimed in front of you.
- 5b. Without stepping, without pausing, immediately right inward block.
- 6a. Right front kick.
- As your leg is coming back down from the kick, chamber the right fist beneath the left armpit in preparation for an upcoming backfist strike.
- 6b. Place your right leg down into a right front stance. Right backfist strike.
- Chamber your left arm to the side in preparation for an inward block. Aim the right arm forward.
- 6c. Without stepping, left inward block.
- Step 7 is going to repeat step 6, but as a mirror image.
- 7a. Left front kick.
- As your leg is coming back down from the kick, chamber the left fist beneath the right armpit in preparation for an upcoming backfist strike.
- 7b. Place your left leg down into a left front stance. Left backfist strike.
- Chamber your right arm to the side in preparation for an inward block. Aim the left arm forward.
- 7c. Without stepping, right inward block.
- Chamber the right fist beneath the left armpit in preparation for a backfist strike. Aim the left arm forward.
- 8. Step forward with the right foot to a right front stance. Right backfist strike.
- Chamber the left knifehand palm-up to the right-side waist. Chamber the right fist palm-up to the left shoulder.
- 5a. Step with the left foot to turn left into a left front stance. Left inward block.
THIRD LINE

Third Line: Knifehand Blocks and Assisted Elbow Strikes

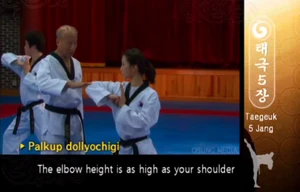
Elbow Strike
- FIRST GOING RIGHT (Ra 3)...
- 9. Stepping with the left foot, turn 270 degrees leftward (i.e., counterclockwise) to a right back stance (i.e., left foot forward). Left knifehand outward block (i.e., knifehand middle block).
- 10. Step forward with the right foot into right front stance. Right assisted elbow strike; this elbow strike is assisted by the left hand; the right fist should slap into the left hand.
- Chamber the right knifehand to the left-side waist in preparation for another knifehand outward block. Chamber the left fist to the right shoulder.
- THEN GOING LEFT (Da 3, mirror image)...
- 11. Stepping with the right foot, turn 180 degress to the left back stance (i.e., right foot forward). Right knifehand outward block.
- 12. Step forward with the left foot into left front stance. Left assisted elbow strike; again, this is an assisted strike, the left fist should slap into the right hand.
- Chamber the left fist to the right shoulder in preparation for a downward block (i.e., low block). Aim the right arm forward.
Third Line transitions to the Second Line: Low Blocks and Inward Blocks
- TRANSITION TO THE SECOND LINE...
- 13a. Stepping with the left foot to turn left into a left front stance (i.e., long stance). Left low block.
- Chamber the right arm to the side in preparation for an inward block. Aim the left arm forward.
- 13b. Without stepping, right inward block.
- 14a. Right front kick.
- 14b. Place the right foot down into a right front stance. Right low block.
- 14c. Without stepping, left inward block.
- Chamber the left fist to the right-side waist in preparation for an upward block (i.e., high block). Chamber the right fist to the left shoulder.
- 13a. Stepping with the left foot to turn left into a left front stance (i.e., long stance). Left low block.
SECOND LINE

Second Line: High Blocks, Side Kicks, and Elbow Target Strikes

The arm is extended during the sidekick in preparation for the upcoming Elbow Target Strike

Elbow Target Strike
Hop to a Cross Stance while simultaneously performing a Backfist Strike
- FIRST GOING RIGHT (Ra 2, i.e., right as seen from the starting position)...
- 15. Step with the left foot to turn left into a left front stance. Left high block.
- In preparation for the upcoming side kick, chamber the right fist to the left shoulder. Chamber the left fist to the left-side waist.
- 16a. Pivot to the left on the left foot, and lift the right leg to perform a right side kick. Hold the right arm out above the right leg as you kick, as if punching with the right arm.
- You are holding the right arm out in order to chamber in for the upcoming target strike.
- 16.b Step down with the right foot into a right front stance. Elbow target strike with the left elbow into the right palm.
- Chamber the right fist to the left-side waist in preparation for the upcoming high block (i.e., upward block). Chamber the left fist to the right shoulder.
- 15. Step with the left foot to turn left into a left front stance. Left high block.
- THEN GOING LEFT (Da 2, mirror image)...
- 17. Step with the right foot to turn right into a right front stance. Right high block.
- Chamber the left fist to the right shoulder. Chamber the right fist to the right-side waist.
- 18a. Pivot to the right on the right foot, and left the left leg to perform a left side kick. Hold the left arm out above the left leg as you kick, as if to punch.
- You are holding the left arm out in order to chamber it for the upcoming target strike.
- 18b. Step down with the left foot into a left front stance. Elbow target strike with the right elbow into the left palm.
- Chamber the left fist to the right shoulder in preparation for a low block (i.e., downward block). Aim the right arm in front of you.
- 17. Step with the right foot to turn right into a right front stance. Right high block.
Return to the starting position: more Low Blocks and Inward Blocks
- BACK TO THE START...
- 19a. Step with the left foot to turn left into a left front stance. Left low block.
- Chamber the right arm to the side in preparation for a left inward block. Aim the left arm in front of you.
- 19b. Without stepping, right inward block.
- 20a. Right front kick.
- As your leg is coming down from the front kick, chamber the right fist beneath the left armpit in preparation for a backfist strike.
- 20b. Hop forward and land in a rear cross stance (left foot behind right foot). Right backfist strike. Kihap.
- The idea of the "hop" is that you're hopping onto your opponent's foot so that he or she cannot step backward away from you, then backfisting your opponent in the nose.
- Some schools eliminate the "hop" and merely have you step forward briskly with the right foot as if stomping on your opponent's foot.
- When the master says "bah-ro", turn and face the master to return to ready position. If you did everything correctly, you'll finish where you started.
- 19a. Step with the left foot to turn left into a left front stance. Left low block.
Helpful Tips
- Some people have trouble remembering the movements in the run up the middle, and then the run back down the middle. This might help: going up the middle it's Backfists and Inward Blocks. Coming back down the middle it's Downward Blocks and Inward Blocks.
- At 16a, when you're doing the Side Kick, don't forget to simultaneously punch to the right with the right arm, so that the right arm is already outstretched in preparation for the upcoming Target Strike. Same goes for step 18a.
- Different schools do step 20b differently. For some schools it's an actual hop into a Cross Stance. For other schools you don't hop, you merely step down forcefully into the Cross Stance. In either case, the point is that your leading foot is supposed to be trapping the opponent's foot so that he can't back up as you Backfist him.
Other Forms in the Taegeuk Series
- Taegeuk Il Jang also called Taegeuk 1 Jang
- Taegeuk Yi Jang also spelled Taegeuk Ee Jang, or Taegeuk 2 Jang
- Taegeuk Sam Jang also spelled Taegeuk Sahm Jang, or Taegeuk 3 Jang
- Taegeuk Sa Jang also spelled Taegeuk Sah Jang, or Taegeuk 4 Jang
- Taegeuk Oh Jang also spelled Taegeuk O Jang, or Taegeuk 5 Jang
- Taegeuk Yook Jang also spelled Taegeuk Yuk Jang, or Taegeuk 6 Jang
- Taegeuk Chil Jang also called Taegeuk 7 Jang
- Taegeuk Pal Jang also spelled Taegeuk Phal Jang, or Taegeuk 8 Jang
")
")
")
See Also
- Poomsae webpage at World Taekwondo Federation (WTF)
- Poomsae webpage at Kukkiwon, the WTF headquarters
- Grand Master Kyu Hyung Lee demonstrating Taegeuk Oh Jang on YouTube
- List of Taekwondo techniques at Wikipedia
- Taegeuk Yi Jang on Taekwondo Animals
- Taegeuk Yi Jang at Taekwondo Preschool
- Taegeuk Ee Jang on Black Belt Wiki
- Taegeuk Yi Jang on Poomse.me
- Taegeuk Yi Jang on Taekwondo Bible, a Korean-developed website